Twist braided wigs are a great way to change up your look without permanently altering your hair. Whether you’re looking for a protective style to give your natural hair a break or simply want to try something new, making your own twist braided wig is an easy and budget-friendly option. In this blog post, we’ll explore how to make your own twist braided wig, from what supplies you’ll need to tips for styling your finished product.
Decide On The Style Of Your Wig
When it comes to choosing the style of your braided wig, there are many options available. Depending on how much time and effort you want to put into creating your wig, you can opt for a simple twist or cornrow braid, a half wig, a full wig, or even a combination of all three. A twist or cornrow braid is the most basic and requires only basic tools and supplies. This style is easy to create and maintain. If you are looking for something more dramatic, you can go for a half wig which covers the top part of the head, giving a fuller look and allowing for more creative styling. Finally, if you want a full-head wig that is more permanent and looks realistic, you can opt for a full wig that covers the entire head. All three of these styles provide different levels of flexibility when it comes to styling and upkeep.
Choose The Right Hair
When selecting the hair for your twist braided wig, it’s important to consider the texture and quality. Synthetic hair is ideal for wigs, as it is lightweight and looks like real human hair. You can choose between synthetic and human hair, but the former is usually easier to work with.
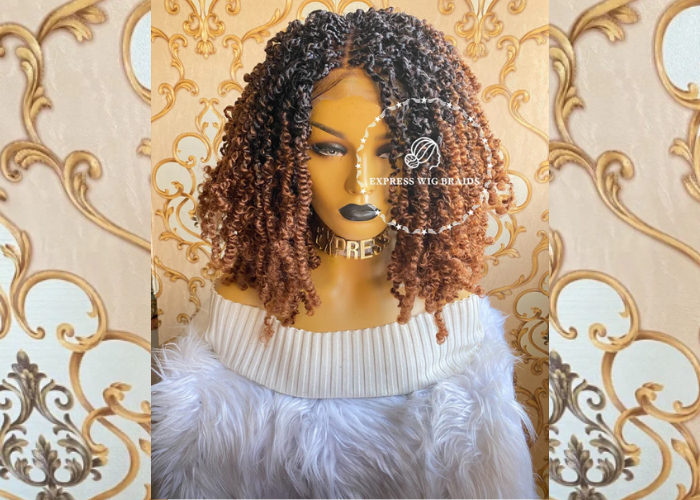
When choosing the color of your wig, you should pick a shade that complements your skin tone. If you have a dark complexion, consider a darker shade such as black or brown, whereas if you have a lighter complexion you may opt for a lighter hue such as blond or platinum.
You should also consider the length of the hair for your wig. The length should be determined by the style you wish to achieve. If you’re looking for a longer wig, you may want to opt for something with more than 18 inches in length.
Finally, you should think about the thickness of your wig. It’s important to find a thickness that works for your face shape and head size. If you have a smaller head, choose something thinner and if you have a larger head, go for something thicker.
Prepare The Hair
Before you begin braid wig, you will need to make sure that your hair is ready. Start by washing your hair and making sure that it is free of any product build-up or dirt. Then, use a deep conditioner to help hydrate and nourish the hair. You can also use a leave-in conditioner to help protect the hair and make it easier to manage. Once the hair is washed and conditioned, you should comb through it with a wide-toothed comb. Start from the tips and work your way up to the root. This will help detangle any knots and create a smooth, uniform texture for your wig. After combing, use a heat protectant spray to help protect your hair from damage due to styling tools. Make sure that you coat the entire length of the hair before beginning to braid.
Braid The Hair
Before you start braiding your hair, it’s important to make sure that the hair is tangle-free and you have all the necessary supplies close at hand. You’ll need a rat-tail comb to help with separating the hair into smaller sections and bobby pins to secure the braids in place.
Once you’ve prepped the hair, it’s time to start braiding. Begin by taking small sections of the hair (about 2 inches) and divide them into three even strands. Then start braiding the hair in a traditional 3-strand braid. Once you’ve reached the end of the hair, secure the braid with a small elastic band.
Continue braiding small sections of the hair until you’ve achieved the desired style of your wig. If you’re making a twist braided wig, once you’ve completed one side of the wig, separate the same section into two strands. Twist the strands together in opposite directions and secure them with a small elastic band. Repeat this process for each section of hair. Once all of the braids are finished, you’re ready to move on to the next step!
Attach The Braids To The Wig Base
Once you have finished braiding your hair, it is time to attach the braids to the wig base. To do this, start by pinning the braid against the perimeter of the wig cap. Next, sew the braid along the edge of the wig cap using a needle and thread. Make sure to sew the braid securely in place to ensure that it does not come loose.
Once the first braid has been attached to the wig cap, it is time to attach the remaining braids. Begin by attaching each braid side by side until you reach the back of the wig. At this point, you will need to adjust the braids so that they form a curved shape along the back of the wig. This will give your wig a more natural look. When you are satisfied with the shape of the wig, sew each braid into place and secure them with thread.
Finally, you can use wig clips or pins to further secure the braids to the wig cap. This will help prevent your wig from slipping or becoming loose. Once all of your braids have been securely attached, you are ready to style your new twist braided wig!
Secure The Wig
Once your wig is completely braided, it is important to secure the hair in place. Start by threading a needle and sewing through the center of each braid. This will help keep the hair from coming undone and create a more secure base. To ensure the wig stays in place, use small clips to secure any loose ends.
Next, use wig glue or adhesive tape to glue down the edges of the wig. This will help keep the wig in place and prevent any tangles or fraying. You can also use bobby pins for extra security.
Finally, style your wig to your liking with hairspray or styling products. Whether you are going for a sleek bob, an edgy mohawk, or an elaborate updo, these simple steps will help you achieve the look you desire.