
Building your own gaming PC is a great way to get the most out of your hardware. Not only do you get to choose the components that are best for your needs, but you can also save money in the process. In this guide, we’ll walk you through the steps necessary to build your very own gaming rig. So, whether you’re a seasoned builder or just starting out, let’s get started!
Choose the Right Components
Building a gaming PC can be a daunting task, especially if you’re not sure what components to choose. There are a few things to keep in mind when choosing components for your build. First, you’ll need to decide on a CPU. If you’re looking for raw performance, you’ll want to choose an Intel Core i7 or AMD Ryzen 7 processor. Both of these options offer excellent performance for gaming and other demanding tasks.
Next, you’ll need to choose a GPU. This is perhaps the most important component for a gaming PC, as it will determine how well your games will run. If you’re looking for the best performance possible, you’ll want to choose an NVIDIA GeForce RTX 2080 Ti or AMD Radeon VII graphics card. These cards offer the best performance on the market and will allow you to play your games at high settings with no issues. However, they are also the most expensive options. If you’re on a budget, you can still get good performance by choosing an NVIDIA GeForce GTX 1060 or AMD Radeon RX 580. These cards are significantly cheaper but still offer good performance for most games.
Finally, you’ll need to choose a motherboard and RAM. For the motherboard, you’ll want to choose.
Assemble Your PC
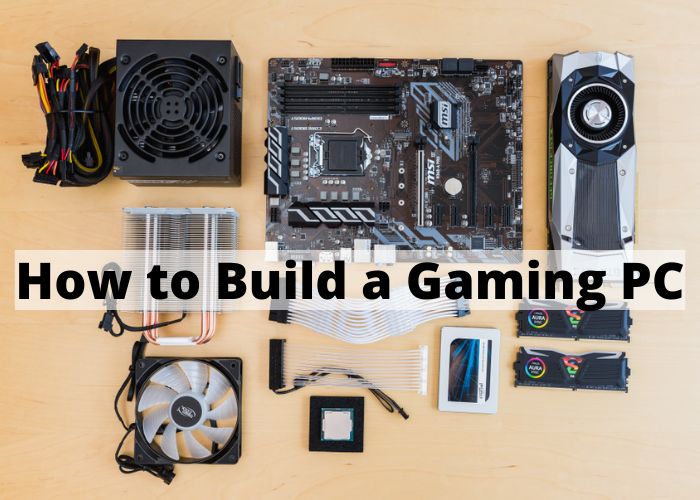
So you want to build a Gaming PC. Whether you’re a first-time builder or a veteran, this guide will help you assemble your very own custom Gaming PC. Building your own PC is rewarding, and it also gives you complete control over every component in your system. Plus, it’s a great way to save money compared to buying a pre-built Gaming PC. So let’s get started!
The first step is to choose the right components for your system. This includes everything from the processor and graphics card to the motherboard and memory. Once you’ve settled on the components you want, it’s time to start building. The exact process will vary depending on the components you’re using, but in general, you’ll need to install the CPU, GPU, motherboard, and memory into the case. Once everything is installed, you can connect all of the cables and turn on your PC. Congratulations! You’ve just built your very own custom Gaming PC.
Install the Necessary
SoftwareBuilding a gaming PC can be a daunting task, but with the right tools and a little bit of know-how, it’s actually quite easy. One of the most important things you’ll need is the right software. Here’s a quick rundown of the must-have software for any gaming PC build.
First and foremost, you’ll need an operating system. Windows 10 is the recommended choice for gaming PCs, as it offers superior performance and compatibility with the majority of games on the market. You’ll also need a CPU cooler, which will help keep your processor running at optimal temperatures. using a high-quality cooler is essential for any gaming PC build, as an overheated processor can lead to poor performance and even damage your system.
Next, you’ll need a motherboard that’s compatible with your chosen processor. This is one of the most important parts of any gaming PC build, as it ensures that all of your components will work together seamlessly. Once you’ve selected a motherboard, you’ll need to choose a graphics card. There are a variety of options available on the market, so be sure to do your research to find the best card for your needs.
Configure Your Settings
Configuring your settings is an important part of building a gaming PC. You need to make sure that your CPU, GPU, and other components are compatible with each other and that they are able to work together to provide the best possible gaming experience. In addition, you need to choose the right motherboard and power supply for your system. Once you have all of your components assembled, you can then begin to install your operating system and drivers. After everything is installed, you can then start configuring your settings to get the most out of your gaming PC.